Morning everyone!
How are we all today?

We all remember the last post what was on here don't we? Surely no one has forgotten? ;)
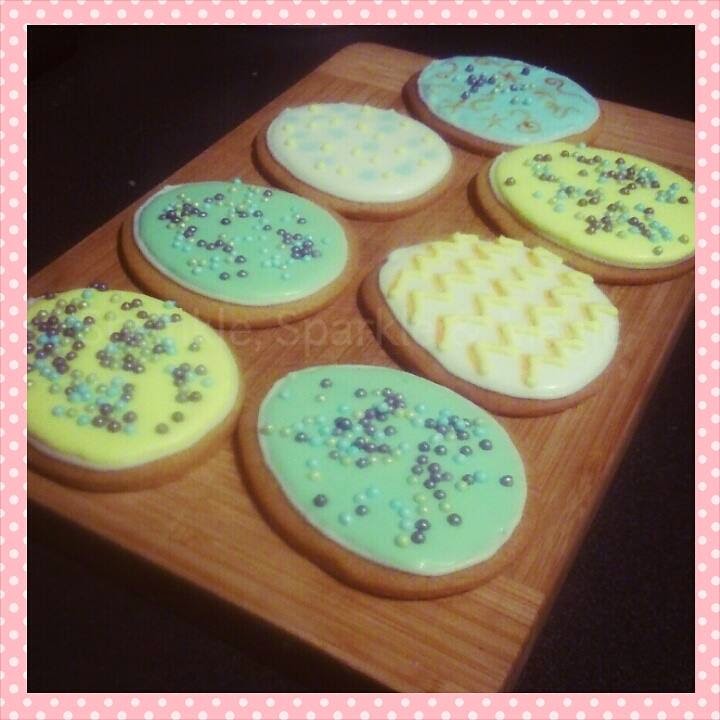
Well, as promised I said I would do the recipe for these Vanilla Spice sugar cookies, some people have asked for the recipe on Instagram so I thought I would post it on here and then link it back through!

Vanilla Spice Sugar Cookie: What you will need
4oz / 113g of Butter
4oz / 113g Sugar
6oz / 170g Plain Flour
2 tsp's of Vanilla
3 tsp's of Ginger
1 Easter Egg shaped cookie cutter (I used Wilton's)
Directions:
1. Start by turning your oven on to 180c (fan)/200c/ Gas Mark 6.
2. In a mixing bowl, place the butter and the sugar together and beat until fluffy, you will know the butter has been beaten enough once it changes colour to what it was originally before. It will go a pale yellow colour.
3. Next add in the Ginger and Vanilla and give it another good mix, until everything is incorporated. Add more ginger or Vanilla if desired.
4. Once everything is mixed, slowly but gradually add in the flour (preferably sifting, if you don't have a sieve don't worry) As your adding the flour in, start to mix the content together, it should eventually be tough to stir.
5. Once all ingredients have been incorporated, place the dough onto a floured surface, sprinkle some flour onto the cookie dough and onto the rolling pin. Start to roll out the dough. Don't forget to keep turning the dough and adding flour underneath, otherwise it will stick to the surface and you will have to start again.
6. Roll out to required thickness for cookies. Once rolled out, using your egg shaped cookie cutter, cut as many eggs as you can out of the sheet, don't worry if you can't get a lot out, you can always re-roll the dough and make some more for the next batch.
Repeat this section until you have no more cookie dough.
7. Place the cookies onto either a greased tray (I used butter and then sprinkle some flour on, but you can use Grease proof paper too!) Make sure when placing the cookies then they have a gap between them all, about two fingers width apart.
8. Place the cookies in the oven on the middle shelf and bake for 5 minutes or until lightly golden brown around the edges. Once baked, take out of the oven and leave to cool for 10 minutes on a wire rack.
To Decorate:
For the decoration you can use anything you wish, melted chocolate, icing sugar, sprinkles or royal icing. On the above cookies, we have Royal Icing.
A quick and easy way for Royal Icing:
1 x 500g Bag of Tate and Lyle Royal Icing
1 x Small cup of cold water
Gel food colouring
Spatula
Various Bowls
Spoons
Cling film and / or damp clean cloths
Always remember to cover all icing with a lightly damp cloth, don't use the icing if it has crusted over
1. Add all the Royal Icing sugar into a deep bowl, and add a couple of tablespoons of water into the mix. Using an electric hand whisk, start mixing the icing sugar on the slowest speed setting. BE CAREFUL OF SUGAR DUST FLYING EVERYWHERE.
2. Slowly start to add a couple more tablespoons into the mix until it starts to become incorporated. Once everything is mixed together, you should be left with a stoggy icing, add a teaspoon of cold water into the mix and beat at a high speed for 5-7 minutes. The texture and thickness will start to change.
There are three types of icing that you will need:
1. Stiff Peak - Dab your spatula on to the icing, once it comes of there should be a peak of icing, if the peak stays up, is sturdy and does not fall, you have achieved Stiff Peak.
2. Soft Peak - Do the same as what you did with Stiff Peak, but if the icing peak bends or falls, this is smooth enough to be Soft Peak.
3. Run out - Run out icing, or is used for filling in or "flooding" a large, flat surface area such as a cookie. To achieve this, you should start with Stiff Peak, gradually adding water to then achieve Soft Peak, there is a method called the "7 Taps" this is when you lift the spatula out of the icing, make a pattern on the surface and then tap the bowl 7 times. After the seventh, all the lines or pattern should disappear. Once you get to this stage you know it is ready. Always keep checking the consistency with the spatula
3. Once you reach Stiff peak, spoon desired amount into bowls and mix with chosen colour (Preferably gel colours, water based ones will cause the consistency of the icing to change) Mix the colours that you need. If your doing the design above, you will need:
White - Stiff Peak
Yellow - Soft Peak
4. With your White Stiff peak icing, place a number 2 nozzle in the piping back and snip off the end. Add in the White stiff peak icing, gently and carefully pipe a pattern of a cracked egg shell around the base of the egg cookie. Just like on the picture below.
5. Leave for a few minutes until the edges are dry, once dried get your white run out icing, flood the inside of the "shell" and leave to dry for t10 minutes.
6. Repeat 4 & with correct colours for the rest of the design, or create your own!
Hope you enjoyed this recipe and the design!
Much love as always,