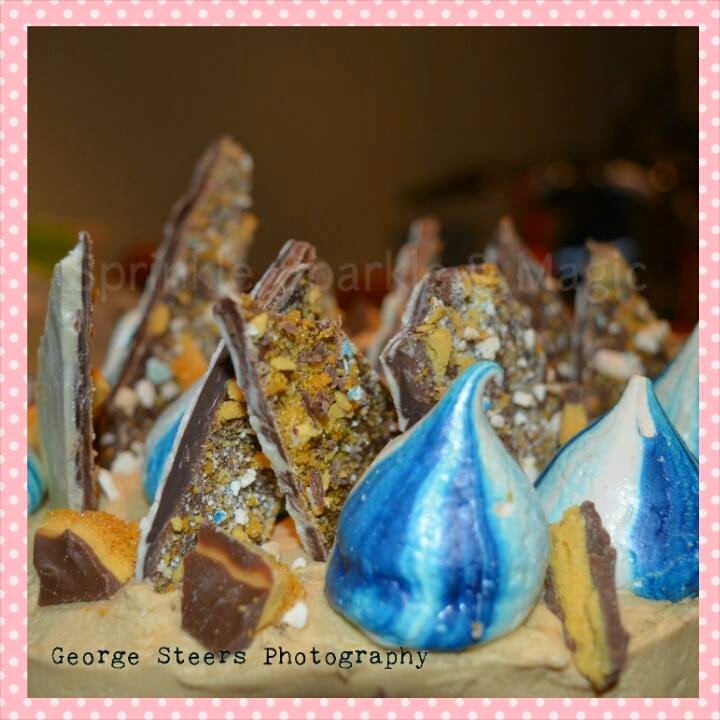
Hey everyone!
Did you see the post on the Meringue Kisses that we made? Fancy having a go at them yourself? To impress people or loved ones? But don't know where to start? Then look no further! All recipe rights and copy rights are from the Meringue Girls, two wonderful and creative ladies! Go check out their site! The Meringue Girls - Meringue Kisses
Wording in this recipe is my wording, but the actual recipe is from the lovely girls. Please go to their website and pay them a visit, they're wonderful!
The Recipe - Taken from Meringue Girls site
ALL RECIPE COPYRIGHT TOWARDS THE MERINGUE GIRLS
Ingredients:
5 Medium sized eggs
300g Golden Caster Sugar
Flavouring if desired, I used 2 teaspoons of Vanilla
Directions:
1. Line a large FLAT baking tray with grease proof paper, possibly making it a little bit bigger so you are able to pick the paper up once out of the oven if you wish.
2. Pre-heat the oven to 200c / Gas Mark 5 - Place 300g Caster sugar into the baking try and place into the oven. Leave for 5 minutes (Also put a timer on your phone, I find it helps me!)
3. Whilst the sugar is in the oven, crack the egg whites into your bowl - Make sure that your bowl is free from any grease, grease will cause the meringue not to form properly resulting in a dull and floppy mixture and the egg wont be able to reach stiff peak.
4. Whisk the egg whites up until they form little bubbles, keep going until the whites have doubled in volume and are forming stiff peaks. You can do this by using the whisker or a fork, place into the whites and pull out, if the mix stands stable and does not flop, you have reached Stiff Peak, if it droops, keep going! You need those peaks!
5. Once you have stiff peaks, your sugar will be ready to come out of the oven. TURN THE OVEN DOWN TO 100c / Gas Mark 1 - BE CAREFUL, SUGAR IS VERY DANGEROUS WHEN HOT AND CAN BURN!..Plus it's very painful!
You will know the sugar is ready the the edges starting to caramelise, now, you can either get a large spoon and spoon the mixture into the eggs spoonful at a time, but I find it difficult as I have a hand held mixer and I'm only good with my right hand - see where I'm going with this? So! I grab the edges of the grease proof paper, lift it out of the tin and poor the sugar into a deep microwavable bowl, I find it easier.
6. So to elaborate on that more, whisking on a slow speed, either spoon the sugar into the egg whites spoon at a time, mixing all the time with the whisk to get the meringue texture. Or you can pour the sugar into the egg whites bit at a time and mix it the same.
7. Once all the sugar has gone into the eggs, add the vanilla and keep whisking it all in starting on slow to begin with then speeding it up keep whisking for 5-7 minutes on a high speed until the meringue mix forms and you start to get stiff peaks again. Get some meringue mix between your fingers and feel it, if it still feels gritty, it needs more of a mix. This is just the sugar that has not been incorporated into the mix.
You will know the meringue mix is read when it forms beautiful smooth and glossy peaks! Gently give the mix a stir, don't beat it otherwise you will knock out all the air and you need that air!
You are now ready to get piping!
1. Line a baking tray with some fitted grease proof paper
2. Grabbing a piping bag, preferably a disposable one, turn the bag inside out and with a chosen colour, paint 5 big, bold colourful lines on the inside of the bag starting from the tip and ending somewhere in the middle of the bag (you don't want to have dye at the top and get it on your hands when turning it inside out) Turn the bag back inside out so the dye is on the inside now.
3.With a large spoon, gently place some of the meringue into the piping bag, in my experience from learning a whole bag will give you a tray full of 24 meringue kisses with a little spare - I have made a print out diagram but I just need to host it first!
4. Get the air out of the top of the bag, place your hand on top of where the mix ends, grip it tight and let the air come out at the top, once done lightly grip it and place on a work surface and gently beat the air out of the bag making sure none of the mixture comes out the other end - This will give you nice and smooth flowing meringue mix with no air bubbles ruining those perfect kisses!
5. I find it's best to hold the piping bag upright, tip at the top since when you cut it off it wont suddenly start to pour out from the gravity. Once done, tightly spin the piping bag till it closes off the Meringue from falling out, when your ready snip the top off of the piping bag, your looking to cut off about an inch and a half.
6. Hold the top of the bag with your strong hand (See how I'm holding the orange Piping bag?) and the other hand resting on the bottom near the tip so you have a grip on where to guide it. In a spare bowl, gently sqeeze some of the meringue out until the white has gone and you start to see streaks of colour. Once this happens you can start to pipe onto the baking tray! :D
7. So the grease proof paper stays still as you pip (as meringue can get quite sticky!) pipe little dots into each corner of the tray then stick down the paper. Once ready, hold the piping bag as mentioned and then hold it at a straight so you are piping downwards. Hold it about two inches from the baking tray, do not hold it near the tray base itself, this was my mistake when learning and created really flat kisses, not the lovely bulbs. I think of when I pipe royal icing at college as it helps me. Your wanting to create a bulb, say like the shape of a bulb you would plant in your garden.
8. So piping it a little off the baking try, gently squeeze the piping bag, don't lower the bag into the meringue 'blob' or start to bring it up as it pipes. When it starts to bulge upwards slightly, bring it up and stop piping suddenly, this will stop the flow of the meringue and give the meringues a nice flick. Once piped all the meringues, you should have 24. if not if you have less or a bit more it's perfectly fine! The recipe makes about 50 but depending on what size you do them you could make up to 100! To be honest when I first started I didn't believe they would all fit onto the tray so I did 6 rows of 3 meringues ;) Keep practicing!
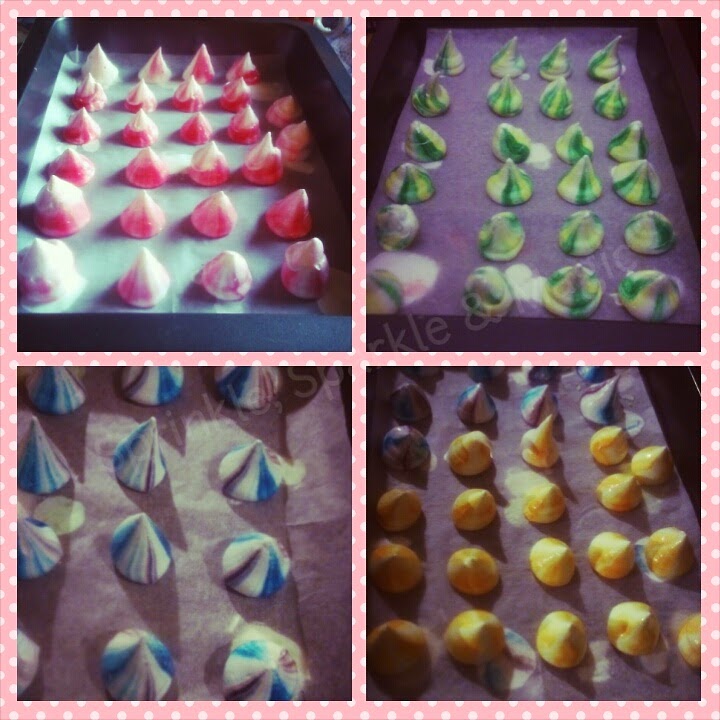.jpg)
9. When all the meringues are on the tray and you cannot fit anymore on, place them into the oven on the middle shelf. Now it depends with all ovens I know, I made some at Mr. B's and kept them in the oven for 30 mins and they we're perfect. Did the same at mine with the same temp and time but they slightly went a caramel colour, which was fine! I thought they looked a bit 'Vintage' hehe still tasted lovely though!
So if I We're you, I would place them in the oven for 20 mins and put a timer on, you are looking to be able to pick them up from the tray easily, if they still stick to the tray they aren't done.
10. After 20 mins, if they are still sticking place them in for another 10 mins. If they are fine then it's all good! Roughly place them in for 20-30 mins :) The center should be still soft and chewy when you take a bite!
Hope this helps anyone wishing to make Meringue Kisses! As mentioned every inch of the recipe and recipe instructions are from The Meringue Girls so please give them credit, the detailed description on piping and how to's are from us here at Sprinkle, Sparkle and Magic. Hope this has helped anyone! Any questions you can email, tweet, facebook message, instagram message or even message or comment us on here! Happy to help!
P.s: DON'T BE AFRAID! It's practice, take a deep breath and if you don't do it right the first time, don't give up! You will get there! I know, I've been there myself and still getting the hang of it! ;)
Much love and Meringue Kisses!